Tuesday, August 13, 2013

Lets talk about foundation baby!

Soo I have been wanting to start this blog for well...going on forever now, and have had such a busy past few months. I recently had my beautiful baby girl 3 months ago, so I am adjusting to new mommy-hood, but I really am hoping to start writing in this blog religiously; so just bear with me here ladies :) 

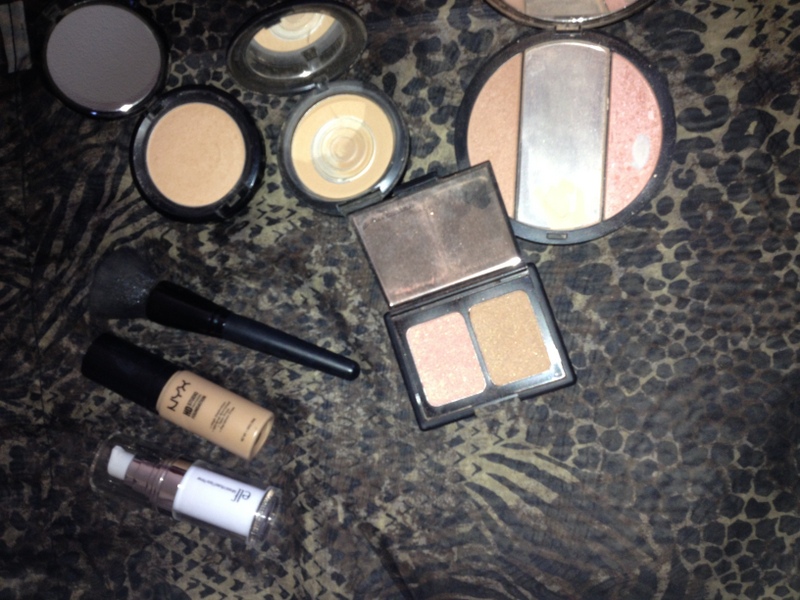
But anyways...... let's talk about foundation! I have the WORST time finding a foundation that really works for me, and I honestly feel like I have tried every single thing out there. I have very dry skin which is finally starting to go back to normal post- baby so thank God for that! So if you're like me, and have dry skin but can't seem to find a foundation that works for you, keep on reading!... I do know that with having drier than average skin I want/need something that has more of a wet/dewy/satiny finish, with decent coverage (since I do have some redness on my cheeks/!), and preferably that will last all day 'cause I don't have time to keep reapplying...I mean, who does? I also know that because I have dry skin my best bet for moisturizing foundations are the ones made for older skin, these foundations are generally made to hide imperfections like wrinkles so they usually have light reflecting properties in them which is what I like to give that dewy sheen finish, and they're usually packed with lotions and moisturizers.... which is a great benefit :) So the hunt begins for a good foundation, and I'm browsing around and come across L'Oreal's VisibleLift Repair Absolute compact foundation, it's said I purchased two different shades, 125 nude beige that matches my skin & 139 honey beige to contour with, because I like to contour with a darker foundation, I think it looks more natural rather than a powder bronzer- especially since I don't find bronzers to be very natural or flattering on my skin since I have a lot lighter of a complexion than normal since having my daughter. Obviously, as I'm sure you've noticed I'm a bit of a rambler...so onto the actual review of this foundation!


What I absolutely LOVE about this foundation!
♡ It has such a dewy, silky flawless finish! I seriously always get complimented and asked what foundation I'm wearing when I use this!
♡ Consistency! I'm big on texture and hate nothing more than to have my face feel sticky from a foundation, esp since I live in Florida where it's very humid and my makeup can wear and turn runny very quickly! On your skin, this is very lightweight and silky, feels like there is nothing on my face while I'm wearing it, and never looks cakey; ever!
♡ Easy and quick to apply, dip it in and go! Plus you don't need much at all! (I apply mine with my Real Techniques Expert Face Brush)
♡ The coloring of the foundation is perfect, I find it harder to find matches in the more pale drugstore foundations, they are either too yellow or pink or dark
♡ You get a lot of product for the price, plus the price is pretty fair ($11.99 for one, and the second was on clearance for $3.58 at Target..score!)
♡ Very moisturizing, and does NOT accentuate dry skin patches! YAY! :)
♡ Can be combined with setting powder, and will not look cakey if using a powder with it!
♡ It's both a concealer and foundation, leaving a completely flawless complexion
♡ It has great things in it for your skin to prevent aging, which is always a plus, at any age ;) It has pro-retinolA, SPF 16, hyaluronic, and pro-lastyl!
♡ I would definitely repurchase this!

What I don't like.....
♥ It can crease under eyes & on eyelids if too much is applied
♥ It tends to run during the humidity :( like I said above, I live in one of the most humid states, (Florida), so know that this might not apply to you!
♥ This foundation has a tendency to border the line of greasy instead of "dewy". I'm sure you all know that there is a very fine line when it comes to the dewy- wet- sexy skin look, and easily many products can say they give you the look but end up too wet and runny, or will make my skin look almost greasy...and since I have dry skin I can only imagine if someone with oily skin would look like?!!And I think this also goes hand in hand with the climate I live in and if you use too much of it, which is very easy to do because if you're like me and need to go over certain spots with a second "coat" OR because it is very hard to pick up this product with your fingers, I just dip my brush into it once and have enough product for almost my entire face! So be careful too much of this isn't pretty! Though, I should also mention, I don't set my foundation with powder, I have tried setting this foundation with a powder though to see what it was like and it does hold & wear better, but I'm not one for the matte look. But Also please keep that in mind that what works for me, might not for you and vise versa, because I do like this foundation and think it has a lot of great qualities!
♥ This foundation doesn't layer well. What I mean by this is, when I pick out foundation I will get 2 different colors one to match my skin tone and one to contour with (I mentioned this above I believe so I wont go too in-depth about it) but I like to apply one layer of just foundation to cover my red cheeks, and then make my contouring lines using the darker foundation; to define my cheek bones, jaw line, forehead, nose, chin, ect (leave a comment below if you want me to explain how to contour correctly and what to use- I LOVE contouring!), and then blend them out with real techniques expert face brush- and what I've found is that whenever I apply the darker color on top of the first original shade, it takes the bottom layer off completely, leaving bare skin...I've never had a foundation do this, it's so weird!! but the best way I can describe it is a dry erase marker when you write on the board the first time writing it's perfect and then when you miss a spot and go over it, it erases the good part too... kind of a sucky analogy, sorry :-(
♥ This isn't really a "don't like" but keep in mind when purchasing this foundation it does come with a sponge to use, but I would personally not recommend using it. In doing so, the sponge will soak up and waste more of the foundation that is actually applied, and does not give a good finish. This foundation will need to be picked up with a brush or other applicator because your fingers will not work, I feel like I can rub my finger around and around in the foundation and still only have a tiny amount on my hand, but if I dip my brush in it and swirl it around once is enough for almost my entire face, weird! Idk! >.<


I will definitely post before and after pictures later!

Thank you for stopping by my blog and taking the time to read my review on L'Oreal's VisibleLift Compact crème foundation! Please comment if you have a question/or would like me to do a tutorial or review on a product/or just to chit chat, I'd love to hear from you!

Friday, March 29, 2013

My Flawless Face Foundation Routine!

Okay so I wanted to do a foundation routine to share with everyone about some of these amazing products I've recently bought and fell in love with!

Lets start with my first few steps, I have extremely dry skin, even though I live in florida- it's winter and my skin is soo dry lately, so what I've been using to rehydrate my skin I always exfoliate my skin every time i wash my face, so I use the apricot St. Ives face scrub (you can use the ones that they have for acne or oily skin if that's what your skin needs). After exfoliating, I use a few drops of bio oil on my face which instantly soaks up and then I apply the Ponds dark spot correcting cream called Clarant B3 in the pink container, and I LOVE this product- not only does it smell so yummy; it moisturizes my face so well but doesn't leave me greasy! After that I let the moutisturizer completely dry and sometimes I will add vasoline or use my St Ives firming skin lotion on my face overnight too. After verything is dry I apply with my fingers (you don't need to use any type of applicator for a primer), my Elf Mineral Infused Primer to my face and let dry COMPLETELY before applying anything to your face! Again this is a product I purchased probably about two months ago and LOVE it! It's $6 which is a great price if you compare it to Smashbox's photo finish primer for $42, which to me they are the same excact product. Both have a very silky silicone feel, with a very fresh clean smell- I'm deff obsessed and will not put make up on my face without this primer. To me this is one of the key staples to my makeup routine because this primer coats your face to make your makeup go on so smooth, silky, and flawless- your foundation wont be splotchy and will stay on all day; esp if you have dry skin like myself this will add a coat of moisture underneath foundation which if you use a full coverage liquid foundation like I do- they can be very drying.

So we've primed our face- now we want to talk about the main staple in my routine FOUNDATION!! Now I have litterally tried every single foundation from liquid to powder, and because I need/want full coverage, I have always gone back to a liquid, so that being said I have recently purchased NYX's HD studio finish photogenic foundation in 04 sand beige. This foundation is mineral enriched, talc free, paraben free, and has high definition coverage. It says it is for all skin types, it softens lines, diffuses light for perfect coverage for studio photos....and to me- it does just that and more. When I purchased this at Ulta I put this on my hand right next to NYX's pore filler and they were so similar, giving the same pore filling satin finish that I was so excited to try this foundation. The way I apply this to my face is just pump out about two (sometimes I need more) pumps and apply it in lines or dots right on my face and then take my Elf powder brush to stipple it on my face and then work it into small circles, around my eyes I will use my finger or a small makeup triangle pad, but this brush works so good to work it into your skin and give you a completely flawless finish. Now this foundation is litterally the best thing I have ever tried because not only does it have buildable coverage which is very important to me but its finish is satin-matte not greasy or glossy or wet to the touch like some others after applying to your skin. On some days I will just wear this foundation, but for this tutorial or how to blog I'm going to give you my full routine. Now we need to set our foundation....Also I want to add a side note in that I LOVE NYX products, and if you haven't tried any, I suggest you do go to ulta because they have testers and this is designer brand makeup for drugstore pricing. I will list all of the products as well as pictures in the bottom of this, so keep reading :)

To set the foundation I use either the Elf high definition powder (which will make your skin so silky smooth and it's a white powder, but it will be clear on your skin), but most of the time I use NYX's matte not flat powder foundation in soft beige and this matches my skin tone right now perfectly, however on lighter days I will use Elf's pressed powder in sand or mac's studio fix powder in NW35 for darker days (when I'm tan :( lol! and pictures of all of these products are below!!) The nyx powder foundation has great coverage and is so soft on your skin and the way you apply it to your face I use another Elf powder brush (I have two one for powder, one for liquid) and I stipple it onto my skin the SAME way as I do foundation the key to making your foundation stay it to pay your brush into your skin and then use it in small circles; doing this will make your pores look smaller and will make your powder stick and lock your foundation in there for litterally all day long wear.

Next is contouring!!! Now I eventually will get my video blog up and working so I can hands on show you how to do this but again, I will add some pictures of contouring to help guide you if you're unsure about it, which I deff was at first! To contour the main things I use are Sephoras sculpting disk which has a blush, bronzer, and highlighter in it (and I'm unsure if you can even still purchase this- I bought it two years ago and have used it to pan! ugh! Now when I went into sephora recently they didn't have this and although I didn't ask- because it was a really small store thats by me when I got home I looked into purchasing it off Amazon and it was $24- but WELL WORTH IT! It's five inches around!) I also use Elf's contouring blush & bronzer in St. Lucia (but saw that they have new colors and can not wait to try Antiqua, which has a really pretty bright pink as the blush! These contour kits are GREAT! they're $3, and have strong pigment, I have it pictured below on my pale skin haha I'm going to do a how to fake bake spray tan tutorial that's why I'm not normally this pale >.<) I will only use a matte bronzer on my face as a contour because I like my highlight to have a little bit of shimmer & some of my coral blush's have gold flaked sparkle in them, but I do have one really sparkly go to bronzer for my neck and chest that I use because I do not want any demarcation marks or (make up lines) this one is Covergirl's trublend minerals in golden sunrise which is a great color compared to the other bronzers that covergirl has some of them tend to be on the orange side, this one is $9 at Walmart for me, and is veryy sparkly & using that on your face can make you look too shiny and/or sweaty = not a good look! Some other matte bronzers that I use for the contour are Elf's mineral glow in bronzed -which I just got and LOVE!, and L'oreal's true match powder in W8 creme cafe! Now L'oreals powder is NOT a bronzer it's just a nice tan bronzed powder because a lot of companies don't have matte bronzers so this is just a trick of the trade I picked up years ago...I use a darker color on my jaw line too which these are all really great for and none of them are too dark or orange at all! Now my Sephora disk has a highlighting color in it which is maxxed and panned out :( and because I haven't gotten another one I purchased a lighter powder than my normal color to use as a contour and highlighting color for under the apples of my cheeks and cheeck lines and on the bridge of my nose, for that color I use Elf's pressed powder in sand which is very pale, not too sheer and great pigment for a $3 pressed powder I would rather use this than other high end powders. For contouring you're going to need a special blush brush just for blush &bronzer-really try not to use your base brushes for multiple things because the colors wont always come out the same or as vivid...okay and then you'll need a reagular large powder brush, or bronzing brush whichever you prefer, and a fan highlighting brush. Mine are all from elf my fan brush was $1 (I honestly didn't feel the need to spend a lot on it because I dont use this brush for anything other than highlighting your cheeck and jaw bones which takes litterally two seconds and to me just wasn't worth spending the money on it), I use Elf's blush brush which is perfect sized for me to fit right under my cheek bone to give the great contour line and then I use the elf powder brush to blend everything out in small circles, or use my eco tools big powder brush- either work great.  A couple tips for highlighting and bronzer are using the bronzer to sculpt your face out to give you definition and shape. I use a small blending brush to contour the sides of my nose, just take the bronzer down the sides of your bridge of your nose to make it look more defined and sharp- but not too dark! Then, I use bronzer on my forehead and start at the hairline and work down in small circles to give a sun kissed look, and also of course your contour line by making the fishy or aka duck face to help you find the line under your apples of your cheek, and then right under your jaw to help define it out and your jaw look slimmer. But all of that is personal prefrence, so it's up to you. I always apply bronzer to my apples underneath my blush which i blend into my contour and then use a shimmer highlight above it closer to your eyebrows almost starting by your eyes at the tops of your cheeks to make a straight light line, this will look like your face is pulled up and tight/defined and also make your cheeks look so perfect and almost doll like wtih the blush and bronzer.

To finish this out I also define my eyebrows out, now this again is personal prefrence you do not have to do this step, but for me having blonde body hair and blonde hair period really, it just makes my eyebrows look like their on vacation haha! so I use the natural line of my own eyebrows to just outline it and make them more defined with a pencil or brow powder. Even though I have blonde hair, I don't like the blonde eyebrow pencils most makeup companies seem to have so I usualy still use a light brown color, for me what works best is $5 Jordanas FabuBrow in 01Taupe or Light Brown and $9 NYX eyebrow marker in 02 Deep brown (all pictured below), and then use a white eyeliner for my highlight and blend that out, and also use a small concelear brush and I use Elf's under eye concelear and highlighter duo and use both to cut out my brows and make them more defined and erase any mistakes, however you might want to use a foundation on the top of your brow to make it more blended of a color and not so light white on top of your brow which can look funny!

And then I use Elf's Mist and Set, two sprays (and always shake well before spraying- even though this product smells horrible it works very well and is only $3) will keep my makeup on all day! I've also recently ordered Model in a bottle makeup setting spray that was $15 or $17 depending on matte finish or not, online at cherryculture.com which is a greatttt makeup site with really great deep discounts!!
Also you can find all of the products I've talked about on Amazon.com (I'm an Amazon freak!!)
Eyeslipsface.com
Nyxcosmetics.com
Cherryculture.com
Sephora.com, and
Ulta.com

Here are some pictures and all are in order of step by step products I've used and tecnique pictures, enjoy :)


Thank you for reading my blog, I hope you enjoyed this semi tutorial and my opinion & get to see some of the products I use daily & swear by!